3D Object Creation
Technical guideline and recommendation
Basic Guidellines
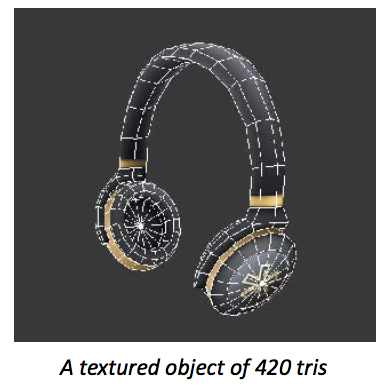
As Hoverlay is targeting a large audience, the content's creator must keep a few rules in mind. Low Poly is the name of the technique used in order to create 3D objects in an optimized way resulting in the best visual looking effect possible while keeping a low cost regarding the device's performances. So the first thing to know is to keep the polycount low : an average object like a button or an icon shouldn't exceed from 300 to 500 triangles. More rare end detailed objects should be reduced as much as possible, balancing optimization and quality. A more detailed character for instance shouldn't exceed 3 000 triangles.

Texturing
The use of procedural textures is encouraged as it means a lower cost in ressources tha an image texture. Flat color and faceted faces are also a way to explore graphic and visual effects. Images textures should be kept at the minimum size possible while keeping balance between light performance cost and visual quality. Recommended size for images textures is 256 pixels x 256 pixels. Use power of 2 texture size like 642, 1282 etc... Texture size must be kept at the lowest size possible.
Protip :
A sharper level of detail may be obtained by creating a 5122 texture, then scaling it down to 2562 once it's finished, and/or applying a sharpening filter.
Always use .png of .jpg for file format. Use .png if you need transparency in your texture.
Unwrapping
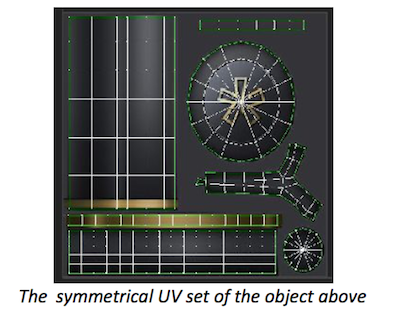
Each object must have a single UV set at best. Multiple objects sharing the same texture is a strong plus as it will use less texture space and therefore less image files. This solution can be highly significant when creating families or sets of objects that can share some details or color scheme. The use of symmetric unwrapping is highly recommended as it allow to gain texture space for maximizinf details.
Regarding 3d meshes whose texture can be exchanged, as long as the geometry stays exactly the same, the Uvs template mustn't change either, as it will allow easy texture switching. That may need a bit of forethinking in order to include all the textures possibilities in a single UV set.
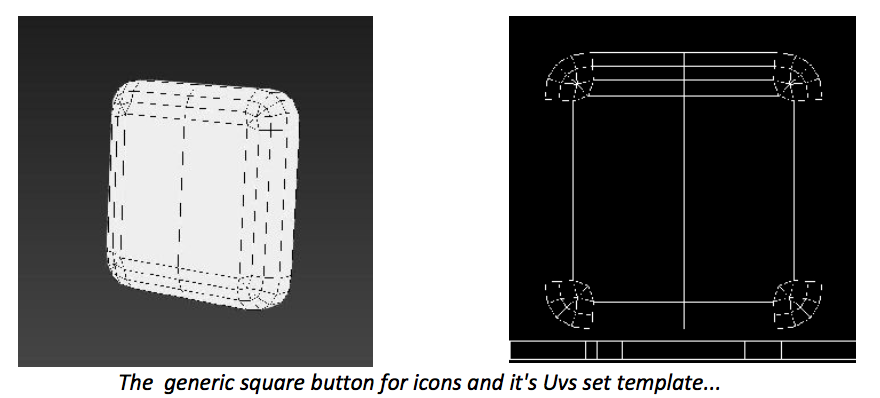
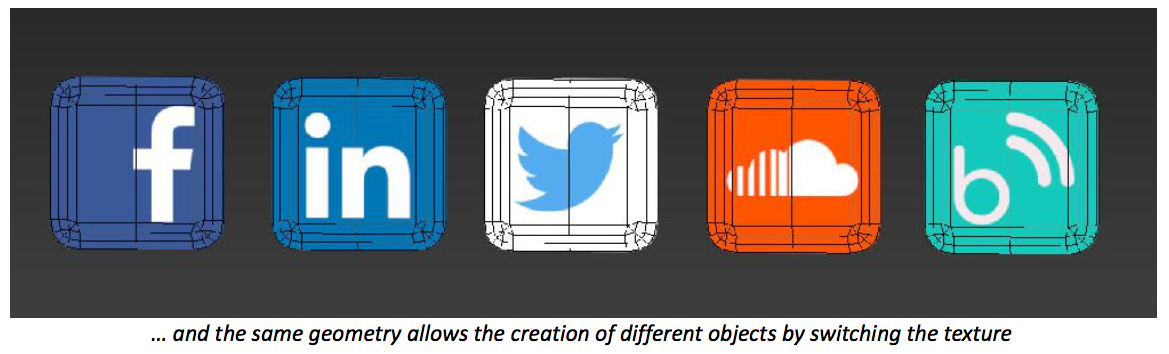
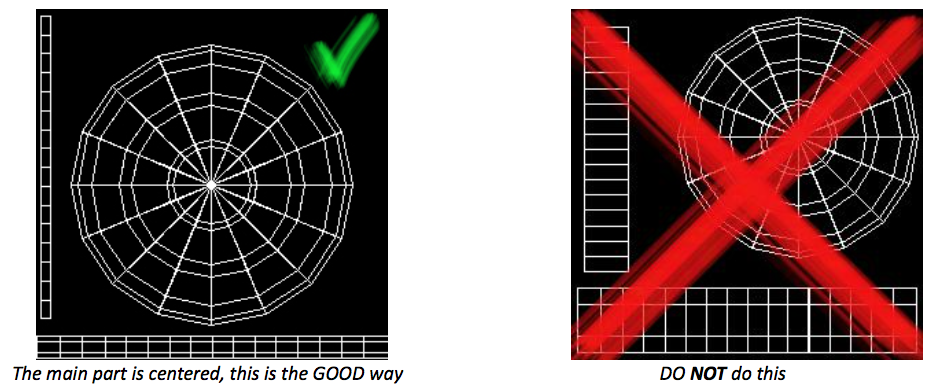
When creating a generic model whose texture will be switchable, you MUST center the main part where the logo or the main focus will be in the Uvs Template. This part is preponderant because when other users with less knowledge will want to apply their image or logo on that object, the only thing they should have to do is to center their logo in the UV template. That rule applies for EVERY object you create with switchable textures in mind.
Advanced Guidelines
Scaling
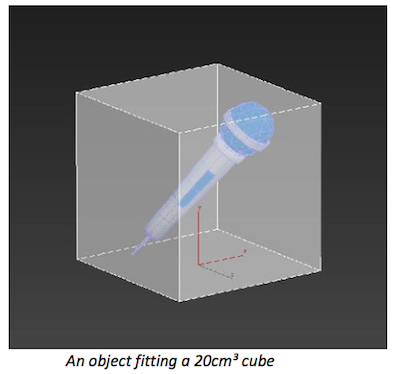
In Hoverlay, the standard size is the same for every object. Each one must fit inside a 20cm3 otherwise it will look disproportionate.
You may use our starter model of the cube box as reference, or create your own
Protip :
20cm in the modeling software = 1 unit in the virtual world
Orientation
It is highly recommended to align the object with the reference cube by matching the position of their pivot points. The reference cube's pivot point is located at the center of the bottom face. It is also at the center of the universe : 0, 0, 0. It is best to rotate the object the way you want, and then align the pivot point.

Objects must be oriented as if they were standing on the floor. Hoverlay can detect if an anchor is horizontal or vertical, and will rotate the objects accordingly, so standard orientation is the same as in the viewports of your 3d software.
Protip :
- ALWAYS do a reset Xform at the very end of your Workflow, before exporting.
- While working with animated models, scaling and Reset Xform MUST be done BEFORE animating the model.
Exporting
Before Exporting :
- Don't forget to rest Xform your model before exporting.
- Make sure that the textures path are valid.
- Export your model to a .fbx format. (You can include geometry and animations)