Best practice to create 3D assets for Hoverlay
TLDR
Here is a quick summarise about Hoverlay :
- Polygon count between 10,000 and 25,000 tend to work best
- Texture files in jpg (vs png)
- Main texture (albedo/diffuse) 2K
- 1024x1024 for secondary texture channels if you use any (like AO, Bump map, etc . - Main texture (albedo/diffuse) 2K
Video tutorial
How to place properly you 3D model in the scene ?
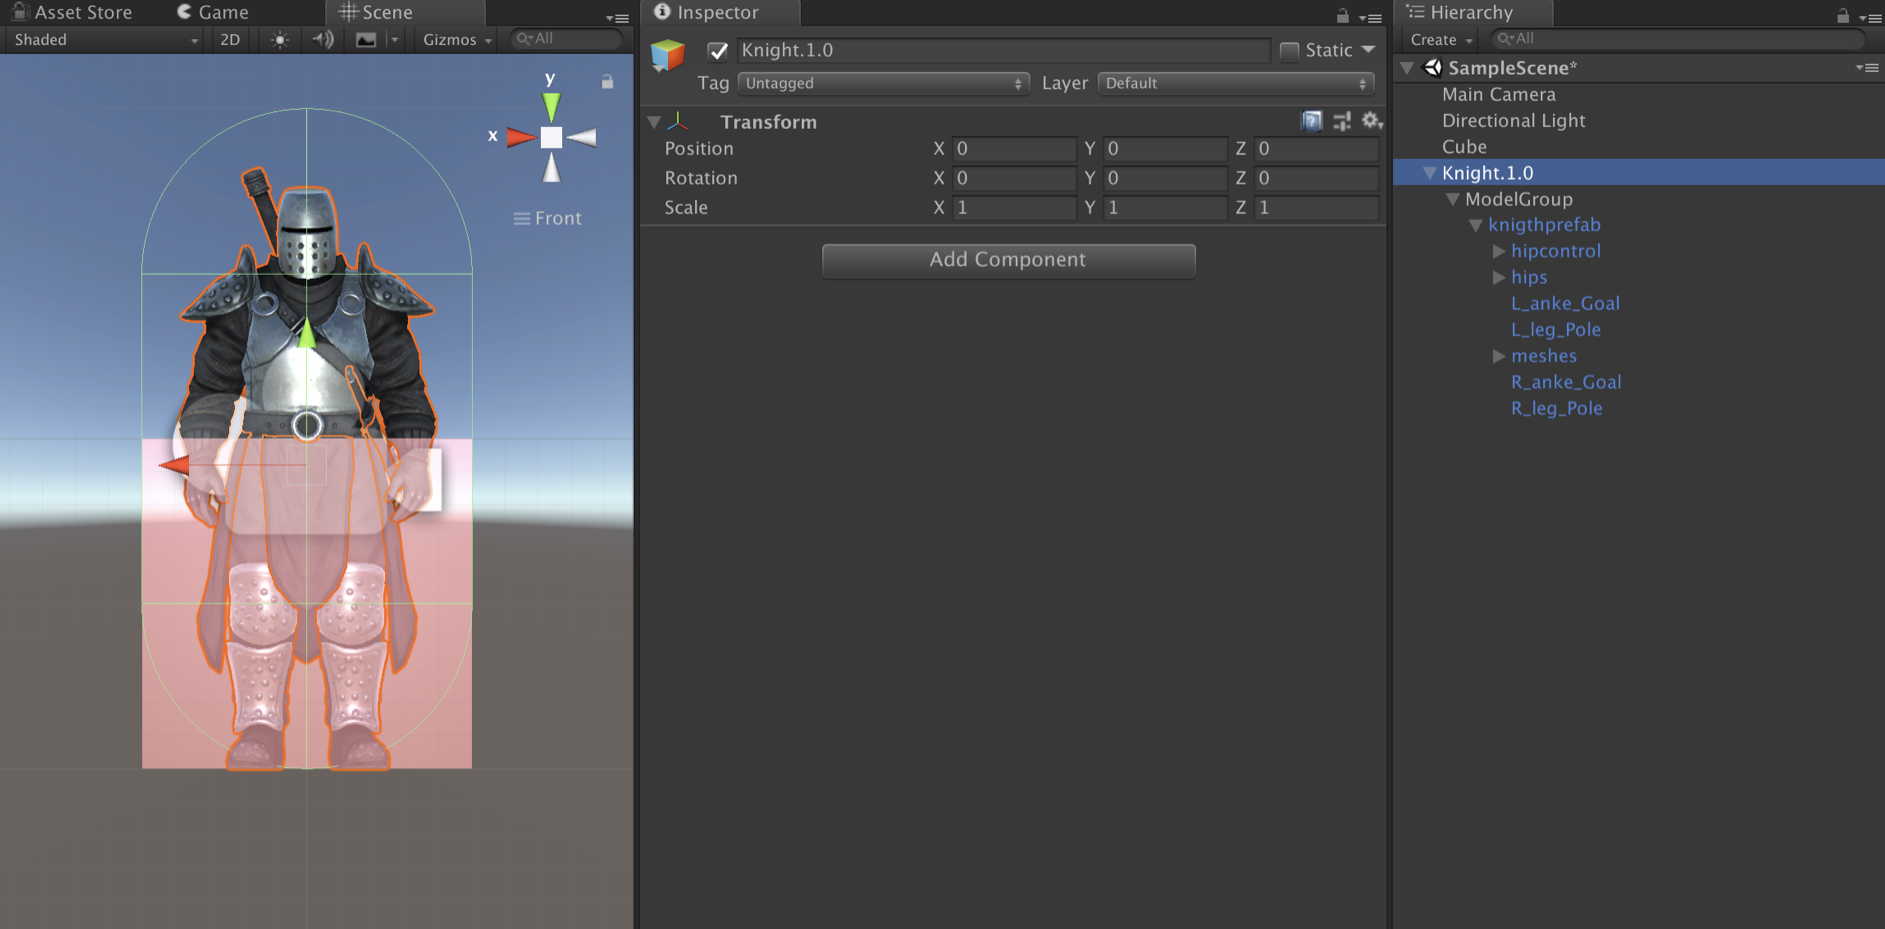
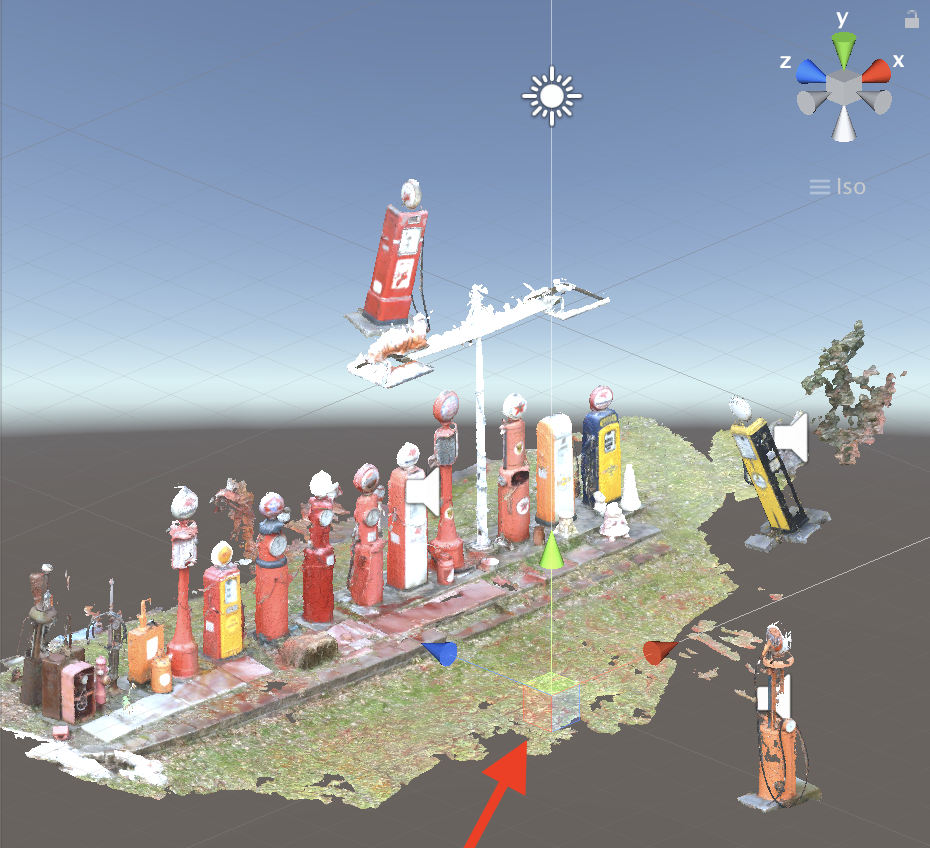
In order to have a good positioning, it’s a good practice to instantiate create a simple 3D Cube Gameobject in the center of the scene. The position transform of the Cube should be :
- x = 0
- y = 0.5
- z = 0
As you can see the cube dimension is 1 x 1 x 1 and is on the ground, meaning he doesn’t not go under the negative y axis. From now on we will use this cube to properly position our customs 3D models in the scene. (Pro tips choose a semi transparent material to see inside the cube)
Bascis : size and placement
- How to properly scale your 3D model ?
1 unit in the Unity world is equal to 1 meter in the physical world. The scale can also be adjusted within Hoverlay, but it is preferable to have your models at the right size. For example : when you create a cube, the included mesh is designed to be 1 unit X 1 unit X 1 unit.
- Place wisely your pivot point.
The pivot point determines the contact point with physical surfaces detected by Hoverlay. In most cases, your prefab pivot point should be placed on the bottom surface of your prefab, or where you would like the contact point to be. Here is the trick : Wrap the GameObject as a child of an empty GameObject and offset it's localPosition.
Model Sizes and textures
Regarding model size, your models have to be optimised for download over a mobile connection :
- Polygon count between 10,000 and 20,000 tend to work best
- Use preferably in jpg to allow for compression
- Main texture (albedo/diffuse): 2K (2048 x 2048)
- Secondary texture channels if you use any (like AO, Bump map, etc .): 1K (1024x1024) or less
Naming and hierarchy
Before importing your custom 3D model into the Unity scene, create an empty prefab and name it : “modelName.1.0” for example : “Knight.1.0” Then another game object under it and name it : “ModelGroup”. Make sure these 2 game object have a vector zero as a position in their transform. Once it’s done attached your custom 3D model as a child of the “ModelGroup Gameobject”. As you can see my cube is well positioned, so it’s very to see if the Knight’s foot touch the ground or not and you can have pretty good estimation about the size of the knight because the height of the square is 1 meter height. There are two available actions via deep links:
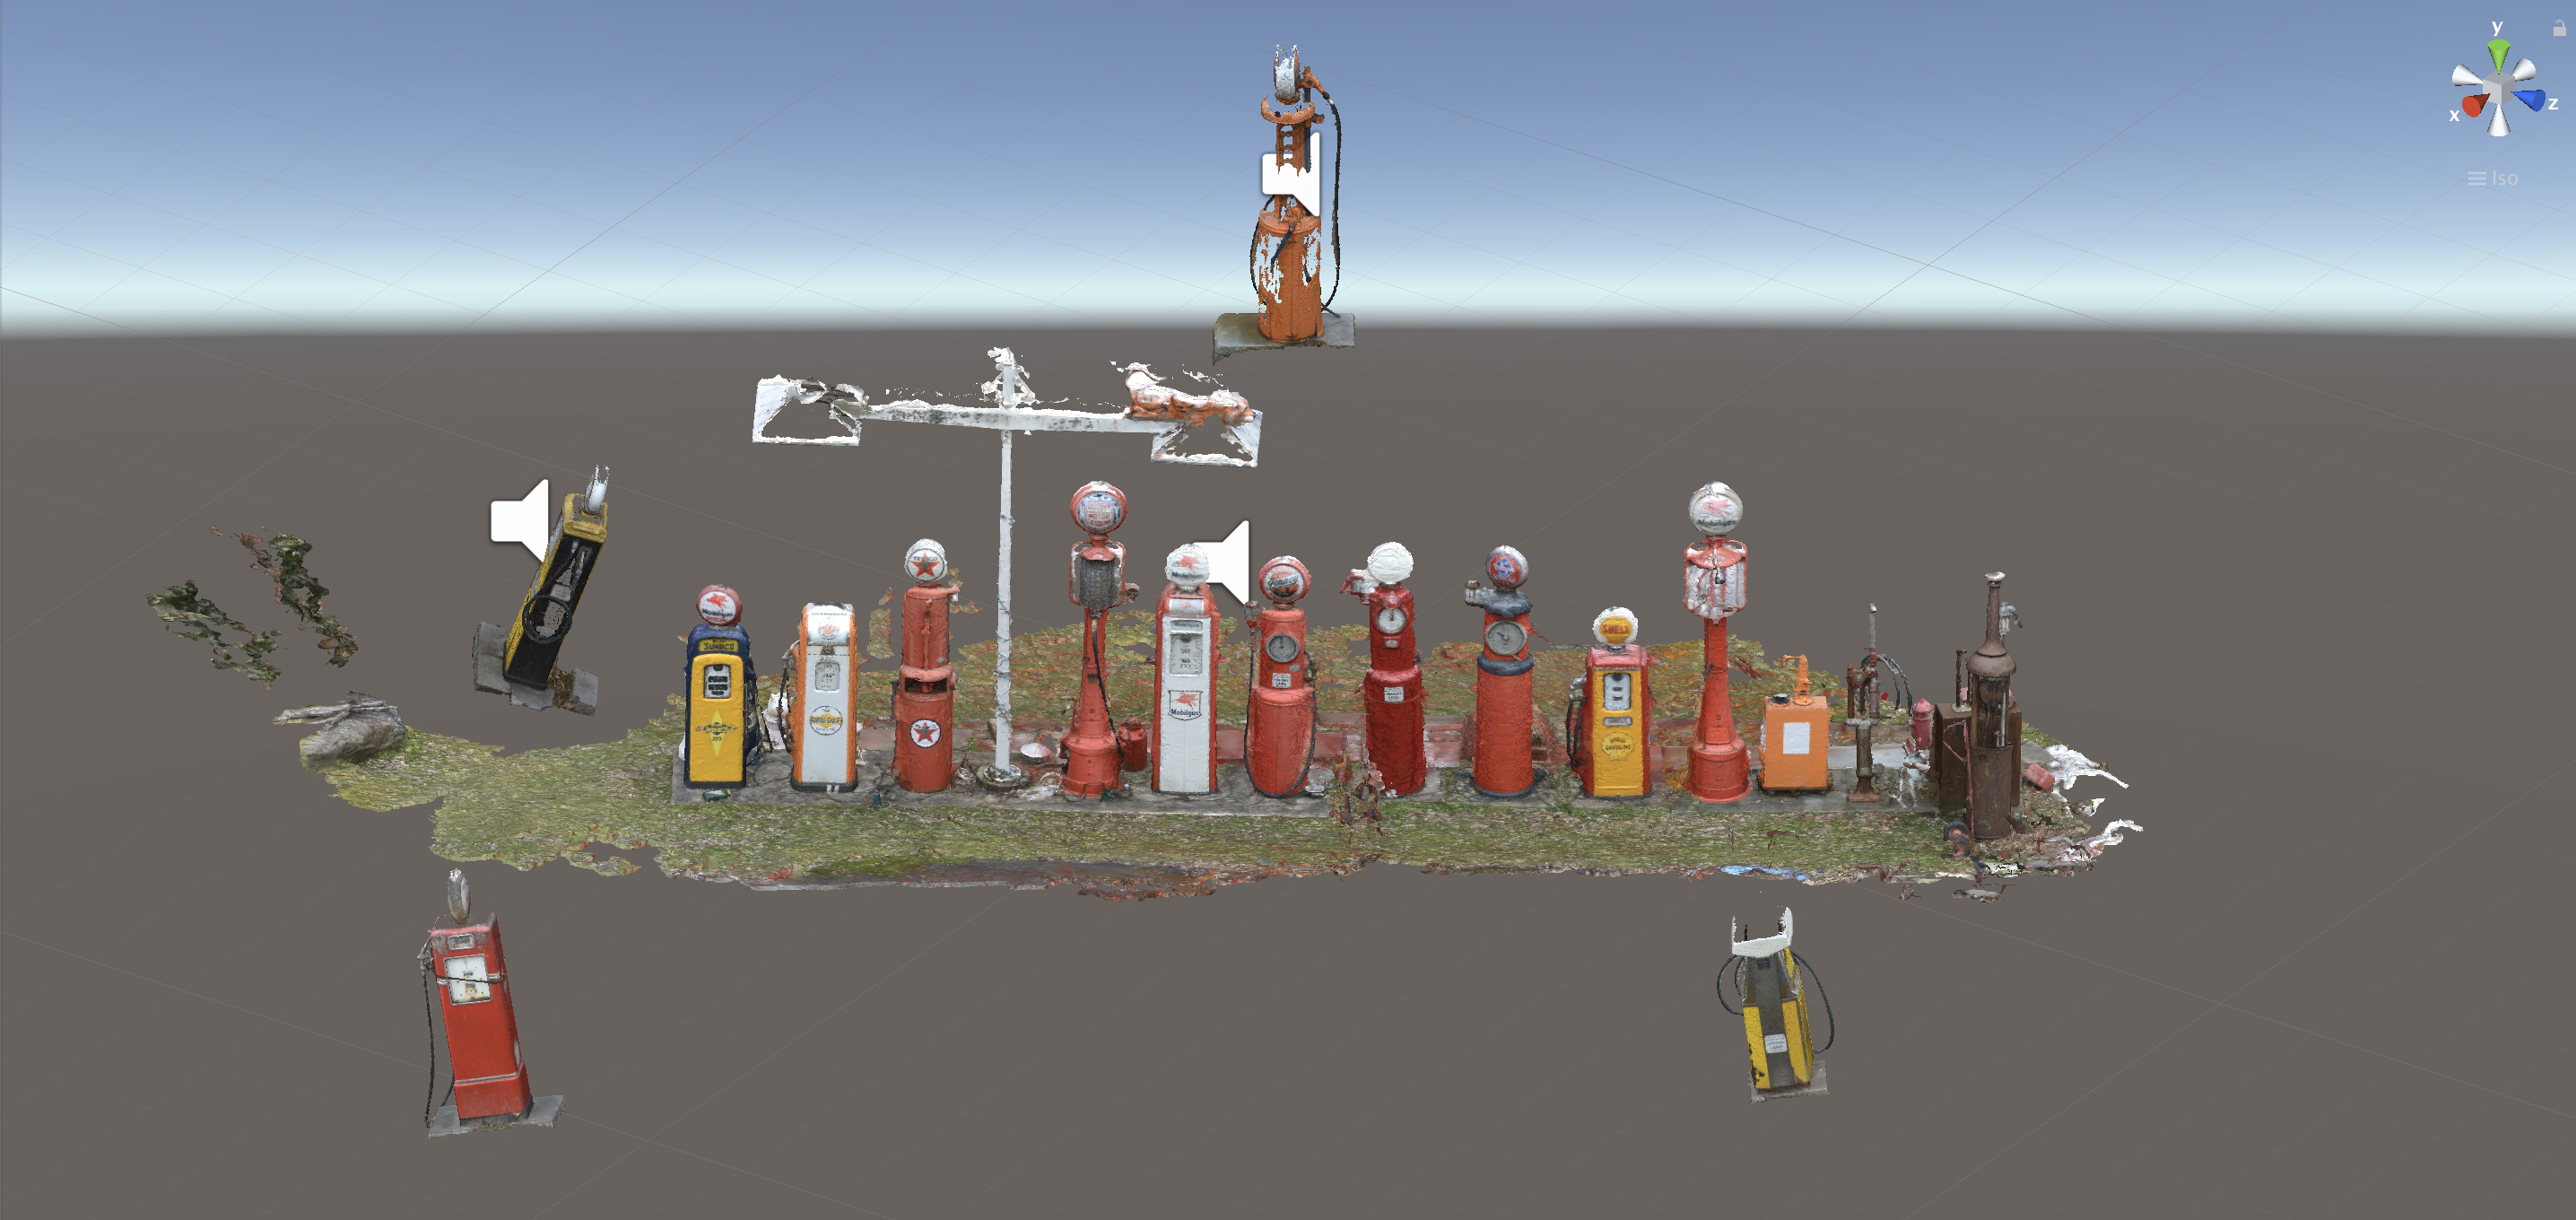
Photogrammetry
Photogrammetric models could have larger texture maps. The main consideration is file size. To ensure a good user experience when your models are loaded over a mobile network, try to keep the combined size of all your model assets below 30MB.